What is Web scraping?
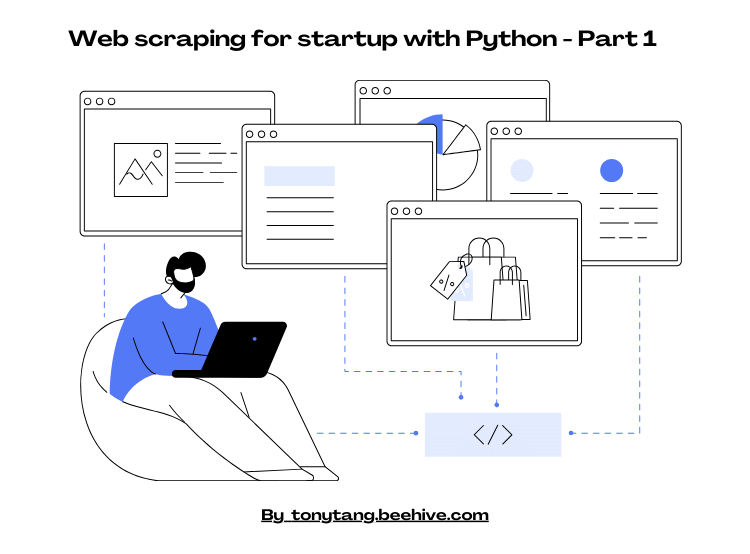
Web scraping is the automated process of extracting data from websites. It involves programmatically retrieving and parsing HTML or other structured data from the web, allowing you to gather large amounts of information that can be used for various purposes, such as market research, price comparison, or content aggregation.
Why do we need webscraping?
Generate leads
You can scrape the email list and contacts from potential customers into database.
Enhance SEO
You can find backlinks opportunities by connecting relevant websites in your nature. Moreover, one thing people overlook is that you can scrape data related to your business nature, consolidate them and render the data in your website. You can create more webpages for google to index and increase the chance of hitting the keywords
Python for web scraping
Python is dynamic typing, lack of compliation requirements, and beginner-friendly nature make it an excellent choice for web scraping, allowing startups to quickly extract and analyze data from the web without complex setup.
Tools we need
pip install beatifulsoup4
pip install selenium
pip install webdriver-manager
Steps before writing code for web scraping
Identify the types of website (whether it is static or constantly updating)
Inspect what elements you want to extract in google devtools ( click F12 in the webpage)
Identify the target html element you want to extract
Then you can start coding 😄
Real-world example 1 (Static website)
Suppose we want to get the e-commerce items in the webapge: https://webscraper.io/test-sites/e-commerce/allinone.
Import required modules
Define the data model which we want to pass the data
item image url
item title
item description
number of stars in the item
number of reviews in the item
item price
import requests
from bs4 import BeautifulSoup

# Initiailize a class to store the e-commerce item
class Item:
    def __init__(self, imgSrc: str, title: str, description: str, num_of_stars: int, num_of_reviews: int, price: str):
        self.imgSrc = imgSrc
        self.title = title
        self.description = description
        self.num_of_stars = num_of_stars
        self.num_of_reviews = num_of_reviews
        self.price = price

items = []
Set the required configurations to get the html source of the webpage
# Add user_agent to mimic the behavior of a web browser
user_agent = 'Mozilla/5.0 (Windows NT 10.0; Win64; x64) AppleWebKit/537.36 (KHTML, like Gecko) Chrome/58.0.3029.110 Safari/537.3'

url = 'https://webscraper.io/test-sites/e-commerce/allinone'

response = requests.get(url, headers= {'User-Agent': user_agent})

# Pass the html to beautiful soup for easier extraction
soup = BeautifulSoup(response.content, 'html.parser')
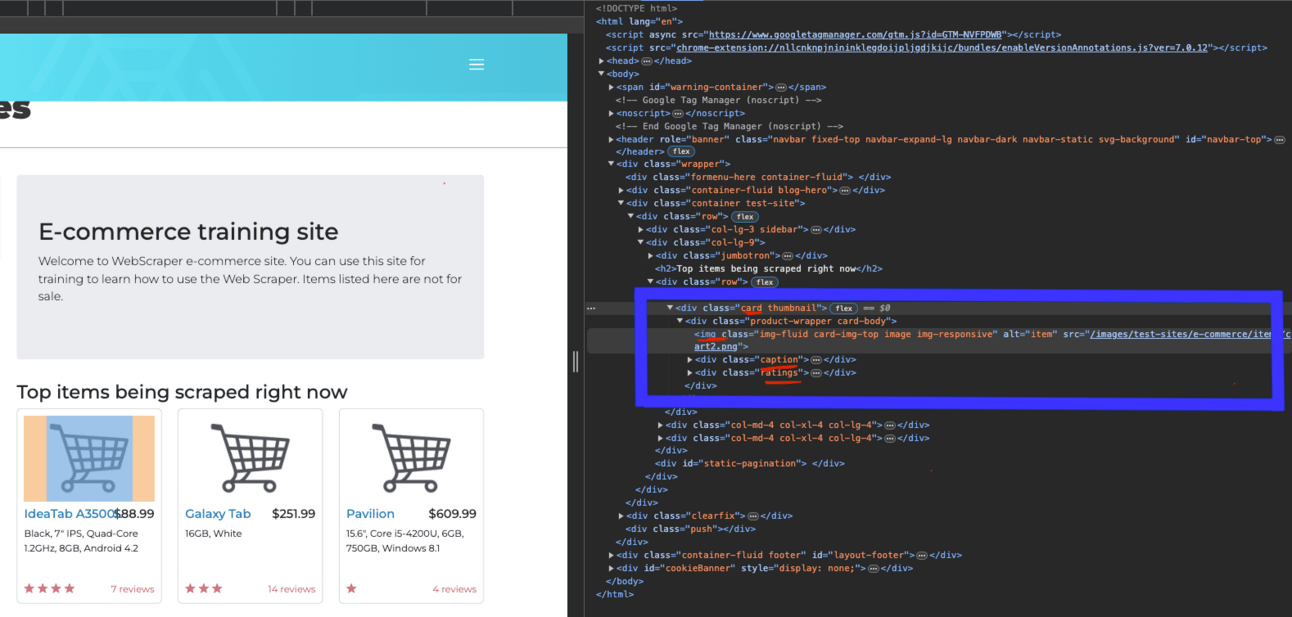
Identify the element we want to extract. Simply right click the element in chrome and click inspect.

The target item will be highlighted when you hover to the html code.
Identify the tag, class, attributes needed to get the required content
All the items are located in the “card” class. We can get all the card elements and loop them one by one to extract the data
The image url is inside the <img src=’’/>
The price and title are inside <h4></h4> tags
The description is in <p></p> of the <div class=”caption”> </div>
The number of reviews and stars are in <p></p> of the <div class=”ratings”> </div>
BeautifulSoup library is used to extract the data according to the class, tags and attributes. Read the docs here
for card in cards:
    imgSrc = 'https://webscraper.io' + card.find("img").get("src")

    caption = card.find("div", {"class": "caption"})
    h4Text = card.find_all("h4")
    price = h4Text[0].text
    title = h4Text[1].text
    description = caption.find('p').text

    ratings = card.find("div", {"class": "ratings"})
    pText = ratings.find_all("p")

    # 14 reviews -> need to split the text using a space and get the first element
    num_of_reviews = int(pText[0].text.split(' ')[0])
    # to get the value in the tag (data-rating)
    num_of_stars = int(pText[1].get('data-rating'))
We can map the data to our data model
items.append(Item(imgSrc=imgSrc, title=title, description=description, num_of_stars=num_of_stars, num_of_reviews=num_of_reviews, price=price))We finish!! We can setup a timer to run this job and get the data right now!!
Real-world example 2 (website with real time data)
Get the bitcoin price and time at https://hk.investing.com/crypto/bitcoin
Setup required configurations for selenium and chrome
import time
from bs4 import BeautifulSoup
from selenium import webdriver
from selenium.webdriver.chrome.service import Service
from webdriver_manager.chrome import ChromeDriverManager


bitcoin_url = "https://hk.investing.com/crypto/bitcoin"

options = webdriver.ChromeOptions()
# Allow headless chrome mode
options.add_argument("--headless=new")

# pass the parameters to simulate real browser
options.add_argument("--dns-prefetch-disable")
options.add_argument("--start-maximized")
options.add_argument("--window-size=1920,1080")
options.add_argument("--no-sandbox")

# disable useless stuff to load faster
options.add_argument("--disable-dev-shm-usage")
options.add_argument("disable-infobars")
options.add_argument("blink-settings=imagesEnabled=false")

# mimic the behavior of a web browser
options.add_argument("user-agent=Mozilla/5.0 (Macintosh; Intel Mac OS X 10_15_7) AppleWebKit/537.36 (KHTML, like Gecko) Chrome/104.0.0.0 Safari/537.36")

# use webdriver-chrome and it will download chrome driver for you to use with selenium automatically

driver = webdriver.Chrome(service=Service(
    ChromeDriverManager().install()), options=options)

# it will stop function if it takes more than 60 seconds
driver.set_page_load_timeout(60)
driver.set_script_timeout(60)

driver.get(bitcoin_url)
# wait 5 seconds after loading
driver.implicitly_wait(5)
Identify the bitcoin price and the last updated time by right click and inspects the element
We can get the texts once we identify the element with the “data-test” tag

Keep the code running using while loop and keep getting the updated data as soon as the website is updating. Don’t make the window close!
while True:
    soup = BeautifulSoup(driver.page_source, "html.parser")
    # using xpath to get the element is the fastest way but it is not substainable. It is better to get the data from its tag
    labels = soup.find_all(attrs={"data-test": True})
    for label in labels:
        bitcoin_price = ''
        if(label.get("data-test") == 'instrument-price-last'):
            bitcoin_price = label.text
            print(f'bitcoin price (usd): {label.text}')
        if(label.get("data-test") == 'trading-time-label'):
            last_updated_time = label.text
            print(f'last updated time: {label.text}')
            time.sleep(2)
Reminders
Most website will rate limit your ip address if you access frequently. Remember not to scrape too frequently and take a look at their data usage policy
Sometimes the website will take more time to load. Make sure you add more timeout
Constantly updating your script is necessary, as the HTML structure of websites can change, causing your web scraping script to break.
Summary
Web scraping can be both fun and challenging, but it is well worth the effort to write your own Python scripts and automate the process. By doing so, you will be able to work much more efficiently and gain valuable insights from the data you collect.
We will have part 2 to explore this topic deeply. Enjoy!!!

